Checking gold items upon purchase: fineness, hallmarks, weight, and authenticity.
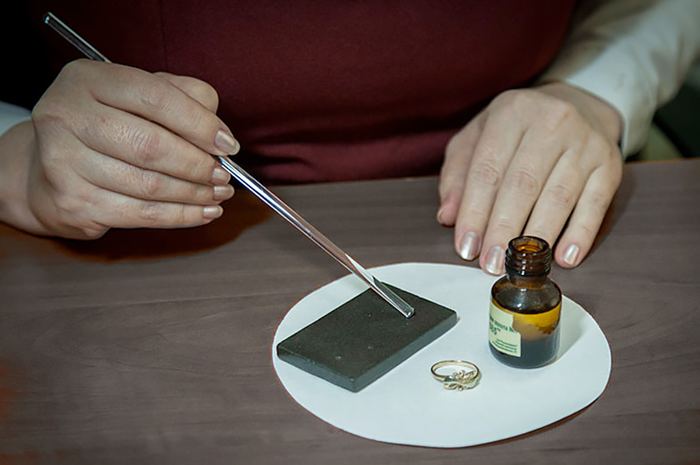
Buying gold jewelry is a matter of both taste and security: it is important to ensure that what you are looking at is genuine gold of the correct purity, rather than just a plating or an alloy with a minimal precious metal content. Simple checks can help minimize the risk of overpaying and give you confidence in the item’s quality.
Below are some practical testing methods you can use right in the store, as well as advice on when it is better to forgo quick checks and seek a professional appraisal instead.
What to do if you have doubts
Don’t buy on impulse. Ask for time to inspect the item, clarify the return policy, and find out if an independent appraisal is permitted. If the seller insists on authenticity but refuses any form of verification or guarantee, that is a strong reason to walk away.
Step-by-step pre-purchase checklist
- Examine the hallmark and purity stamp under a magnifying glass; check the quality of the marking.
- Cross-check the tag, receipt, and description: purity, weight, gemstone settings, and manufacturer.
- Assess the color and signs of wear: look for indications of plating or unevenness.
- Perform a magnet test as a preliminary check (though this is not definitive proof).
- If in doubt, opt for an instrumental test or a professional appraisal.
- Clarify return and warranty terms before paying.
If you are buying a piece on the secondary market—especially one with gemstones or a complex design—it is wise to plan for an independent appraisal right away; this allows you to verify the gold purity, the quality of the stones, and whether the item justifies its stated price.
In the luxury segment, such inspections are often arranged through specialized appraisers and dealers—such as the Luxe Brokers Group in Beverly Hills.
The golden rule is to combine a visual inspection, documentation review, and professional diagnostics. The higher the price and the more complex the piece, the less sense it makes to rely on “DIY” methods—and the more important it becomes to have it checked by specialists.
Preparing for the inspection: what to bring and what to request from the seller
A proper inspection of a gold piece begins before you even reach the display case; having the right tools and a clear plan of action ready in advance minimizes the risk of errors and helps you quickly spot discrepancies regarding purity, weight, condition, and gemstones.
The goal of preparation is to create an environment where you can calmly examine the jewelry, cross-reference the details (hallmarks, documentation, weight, magnetic properties), and make a decision without pressure or haste.
What to bring
- A 10x magnifying glass? – for reading hallmarks and inspecting solder joints, micro-cracks, scuffs, signs of repair, and suspicious coatings.
- A small flashlight – to illuminate hard-to-reach areas (the inside of rings, clasps, and stone settings).
- A strong magnet (not a souvenir type) – for a quick preliminary check for magnetic alloys (important: a lack of reaction does not confirm the item is gold).
- A microfiber cloth – to gently wipe the item and reveal scratches, tarnishing, chips, or uneven coloring.
- A notebook or phone notes – to record the hallmark, stated weight, price per gram or per item, return policy, and tag or seal serial numbers.
- Gloves (optional) – useful when inspecting glossy surfaces to avoid leaving fingerprints.
If the purchase is expensive or raises doubts, prepare an inspection plan in advance: determine which details you need to see (hallmark, tag, documents), what can be measured on-site (weight), and what requires professional appraisal or a gemologist.
Do not use aggressive testing methods on-site (such as a needle file, acids, or scratching the stone or metal) unless the seller has agreed to this in writing; you risk damaging the item and forfeiting your right to a return.
Ask the seller about the conditions for inspection—this is standard practice and often directly affects the quality of the check. The more transparent the conditions, the lower the likelihood of hidden issues.
- Good lighting: bright, neutral light without colored bulbs; Ask to move closer to a light source or a window.
- Unrushed time: the opportunity to calmly examine the item for 5–10 minutes, open and close the clasp several times, and check the fit.
- A clean inspection area: a cloth or mat on the table to prevent dropping the item or scratching the surface.
- Weighing in your presence: weighing the item on retail scales, showing the zero reading before weighing, and stating the scale’s precision.
- Documentation: receipt, sales slip/tag, details on the metal purity and manufacturer; documentation or specifications for any inserts (gemstones), if applicable.
- Hallmark verification: the opportunity to examine the hallmark and maker’s mark under a magnifying glass (without objections like “don’t touch that” or “it’s not necessary”).
- Return and exchange policy: explaining the rules before payment; clarifying timeframes, grounds for return, and requirements regarding the integrity of the seal or tag.
- Documenting condition: if possible, noting visible features (micro-scratches, repairs, resizing) on the receipt or order form to avoid disputes.
Bottom line: come prepared to make your purchase, ask for proper inspection conditions, and document key data. This approach does not replace expert assessment, but it allows you to quickly weed out risky options and make an informed gold purchase—based on hallmarks, documentation, weight, and the seller’s transparency.